
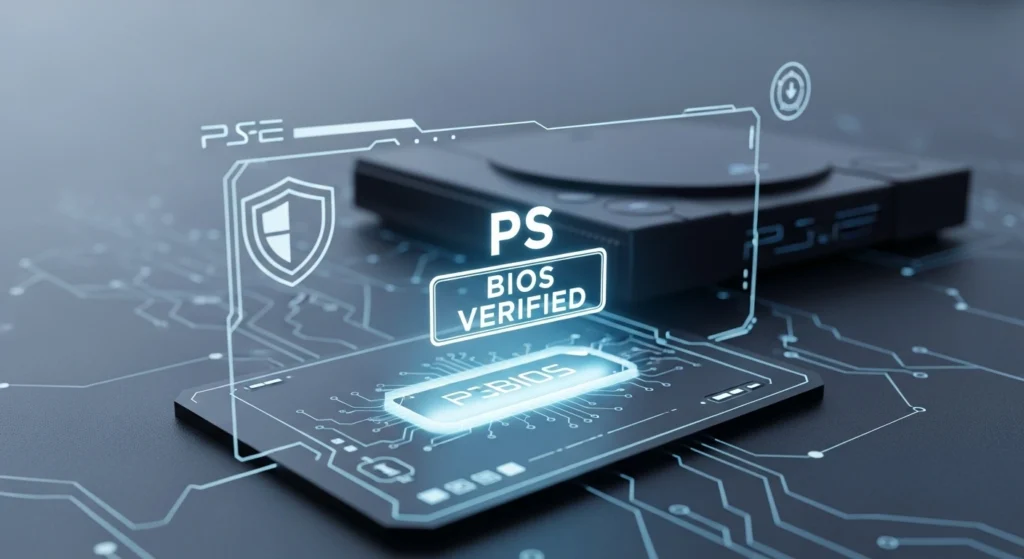
If you’re diving into the world of PlayStation emulation, chances are you’ve heard the term “BIOS” more than once. But what happens when you need to prove your BIOS file is legit, secure, or compatible? That’s where the PS BIOS Claim Tool comes in.
This tool is designed to help gamers, retro tech enthusiasts, and emulator users easily verify and claim their PS2 BIOS files without dealing with confusing command lines or risky third-party sites. Whether you’re setting up RetroArch, PCSX2, or another emulator, having a clean and verifiable BIOS is essential—and the claim tool makes it simple.
In this beginner-friendly guide, we’ll walk you through exactly how the PS BIOS Claim Tool works, why it matters, and how you can use it properly in 2025. No jargon. No tech overwhelm. Just clear steps to get your PS2 games running safely and smoothly.
Contents
- 1 What Is the PS BIOS Claim Tool?
- 2 Why You Need to Claim Your BIOS File
- 3 Is the PS BIOS Claim Tool Legal and Safe?
- 4 Download the PS BIOS Claim Tool Below
- 5 How to Use the PS BIOS Claim Tool (Step-by-Step)
- 6 Supported BIOS Formats and Emulators
- 7 Common Errors and How to Fix Them
- 8 Tips to Keep Your BIOS Files Secure
- 9 Final Thoughts: Do You Really Need It?
What Is the PS BIOS Claim Tool?
The PS BIOS Claim Tool is a utility designed to verify and register your PlayStation BIOS files—usually required for running PS1 or PS2 emulators like PCSX2, RetroArch, or DuckStation. Its main purpose is to confirm that the BIOS file you’re using is genuine, uncorrupted, and compatible with modern emulation platforms.
Think of it as a security checkpoint for your emulator setup. Instead of blindly trusting any BIOS file downloaded from the internet—which could be outdated, modified, or even unsafe—the claim tool scans the file, matches it against known checksum values, and ensures it meets the proper standards.
For emulator users, especially those concerned about stability, legal safety, and performance, this tool brings peace of mind. It also simplifies BIOS management if you’re using multiple emulators across devices.
While some BIOS tools are buried in forums or packed with technical jargon, the PS BIOS Claim Tool is built to be user-friendly—even if you’re new to the world of retro gaming. In short: it helps you avoid problems before they start and keeps your setup clean, consistent, and reliable.
Why You Need to Claim Your BIOS File
Using an unverified BIOS file can cause more problems than most gamers realize. From game crashes and graphical glitches to emulator incompatibility and potential malware, the risks are real. That’s why claiming your BIOS file with a proper tool is more than just a tech step—it’s a smart move.
The PS BIOS Claim Tool helps ensure the BIOS you’re using is authentic and safe. It checks whether your file matches official checksum values (unique file signatures), confirming that it hasn’t been tampered with or corrupted. This is crucial if you want to avoid random bugs, freezing, or games that won’t even boot.
Another reason? Cross-emulator compatibility. Some BIOS files might work on one emulator but fail on another due to missing firmware data. Claiming the BIOS helps confirm that it’s a full, clean dump—giving you peace of mind whether you’re using RetroArch on Android or PCSX2 on your laptop.
And for those concerned about legality: using a BIOS file you personally dumped from your own console is usually within fair use. The claim tool doesn’t bypass any laws—it just confirms you’re using what you already own, cleanly and safely.
Is the PS BIOS Claim Tool Legal and Safe?
The short answer? Yes—if used responsibly.
The PS BIOS Claim Tool itself is a legal utility. It doesn’t provide or distribute BIOS files; instead, it simply verifies the integrity of a file you already own. That distinction is important. As long as you’re using a BIOS that you legally dumped from your own PlayStation console, you’re operating within safe and generally accepted legal guidelines—especially under fair use in many regions.
The tool does not unlock content, bypass DRM, or modify your emulator. It just confirms whether your BIOS is complete, untampered, and compatible with modern emulators. It’s like running a health check on your system—no hacking, no piracy, just verification.
In terms of safety, the PS BIOS Claim Tool is designed to be lightweight and secure. Most trusted versions are open-source or come from established emulator communities. That said, always download the tool from an official website or a well-known emulator forum to avoid shady imitations. Avoid unofficial repacks or anything bundled with ads, installers, or EXE files that seem suspicious.
Used properly, it’s both legal and one of the safest steps you can take in setting up a stable emulator.
Download the PS BIOS Claim Tool Below
Start verifying your BIOS files safely and easily with the official PS BIOS Claim Tool. Whether you’re setting up PCSX2, RetroArch, or any other PlayStation emulator, this trusted utility ensures your BIOS is clean, compatible, and ready to use. No more guessing—just smooth setup and reliable performance.
Click the button below to download the latest version:
How to Use the PS BIOS Claim Tool (Step-by-Step)
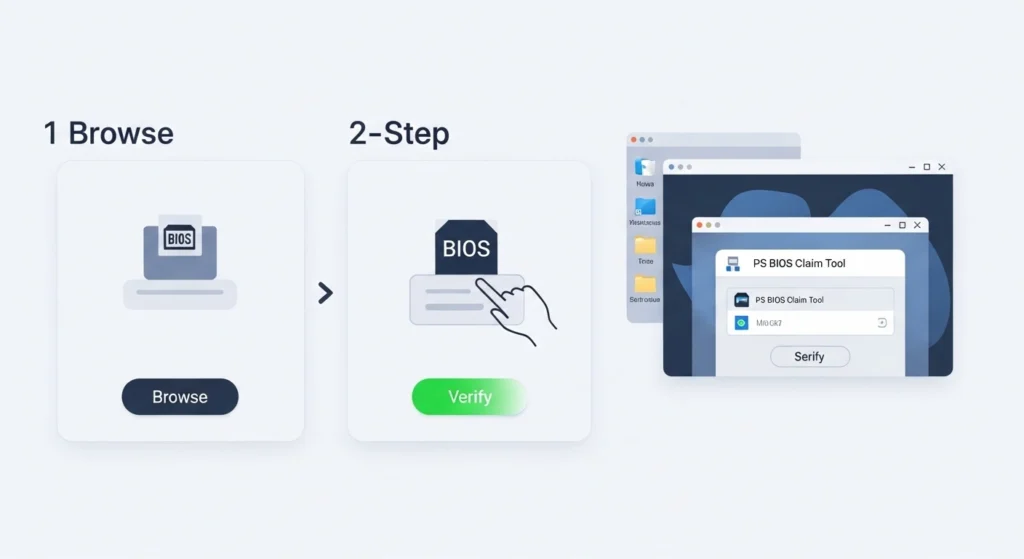
Setting up the PS BIOS Claim Tool is straightforward—even if you’re not tech-savvy. Just follow these simple steps, and you’ll have your BIOS file verified and ready to use in no time:
Step 1: Download the Tool from a Trusted Source
Visit the official website or a reliable emulator forum (like PCSX2.net or RetroArch’s GitHub) to download the latest version of the PS BIOS Claim Tool. Avoid random third-party sites—stick to sources the community trusts.
Step 2: Extract the Files
Once downloaded, unzip the folder. You’ll typically see an executable file (e.g., psbiosclaim.exe) along with a ReadMe or instructions. No installation is required—just run it from the folder.
Step 3: Load Your BIOS File
Click “Browse” or “Select File” in the tool’s interface and choose your PlayStation BIOS file (usually named something like SCPH1001.BIN, SCPH39001.BIN, etc.).
Step 4: Run the Claim Process
Hit the “Claim” or “Verify” button. The tool will analyze the file and compare its checksum against known authentic BIOS hashes. If it passes, you’ll see a confirmation message.
Step 5: Save or Export the Verification
Some versions of the tool allow you to export a small .claim file or a log that proves your BIOS was verified. This can help when using multiple devices or sharing setups with friends.
That’s it! You now have a verified, claimed BIOS file—ready to be used with any emulator that supports it.
Supported BIOS Formats and Emulators
The PS BIOS Claim Tool is designed to work with the most common BIOS formats and emulators used by retro gaming enthusiasts. Its goal is to ensure broad compatibility across platforms—so whether you’re on PC, Android, or even macOS, you’ll likely be covered.
Supported BIOS File Formats
The tool recognizes and verifies all major BIOS formats used for PlayStation emulation, including:
- .BIN – Most widely used for PS1 and PS2 BIOS files
- .ISO – Occasionally used if dumped from disc
- .IMG – Raw image file versions
- .ZIP – Some tools support zipped BIOS archives, but it’s best to extract them first
Make sure your BIOS file follows standard naming conventions like SCPH1001.BIN (for PS1) or SCPH39001.BIN (for PS2). These are model-specific dumps from different versions of the PlayStation hardware.
Compatible Emulators
Once verified, your BIOS file can be used across multiple platforms. Popular emulators that support claimed BIOS files include:
- PCSX2 – One of the most advanced PS2 emulators for Windows, Linux, and macOS
- RetroArch – A multi-system frontend that supports PS1/PS2 cores like Beetle PSX and PCSX2
- DuckStation – A modern and highly compatible PlayStation 1 emulator
- AetherSX2 (Android) – For mobile PS2 emulation
- XEBRA & Mednafen – Advanced users may use these for enhanced accuracy
With a claimed BIOS, you’ll avoid compatibility warnings, random crashes, and ensure better emulation across devices.
Common Errors and How to Fix Them

Even with a clean BIOS file and the PS BIOS Claim Tool in hand, you might run into a few hiccups. Don’t worry—most of these are simple to fix if you know what to look for.
Error: “Unsupported File Format”
Cause: The file may be compressed, renamed incorrectly, or not a real BIOS.
Fix: Make sure the BIOS file has a valid extension like .BIN or .IMG and isn’t still inside a .ZIP folder. Always extract compressed files first before using them.
Error: “Checksum Mismatch” or “Invalid BIOS”
Cause: The BIOS file might be incomplete, corrupted, or modified.
Fix: Re-dump the BIOS from your console if possible. If you got it elsewhere, try verifying the file hash using a third-party checksum tool and compare it to official values listed on trusted emulator forums.
Error: Tool Crashes or Freezes
Cause: This could be a compatibility issue with your OS or a missing dependency.
Fix: Run the tool in compatibility mode (Windows), or try the portable version. Make sure your system meets the tool’s basic requirements (e.g., .NET or Java runtime, depending on version).
Error: BIOS Claimed, But Emulator Still Rejects It
Cause: Some emulators need the BIOS placed in a specific folder or named a certain way.
Fix: Double-check emulator documentation. For PCSX2, for example, BIOS files should go in the bios/ folder and must be selected manually in the settings.
Bonus Tip: If the tool still won’t recognize the file, try downloading a fresh copy of the tool—it may be outdated or corrupted.
Tips to Keep Your BIOS Files Secure
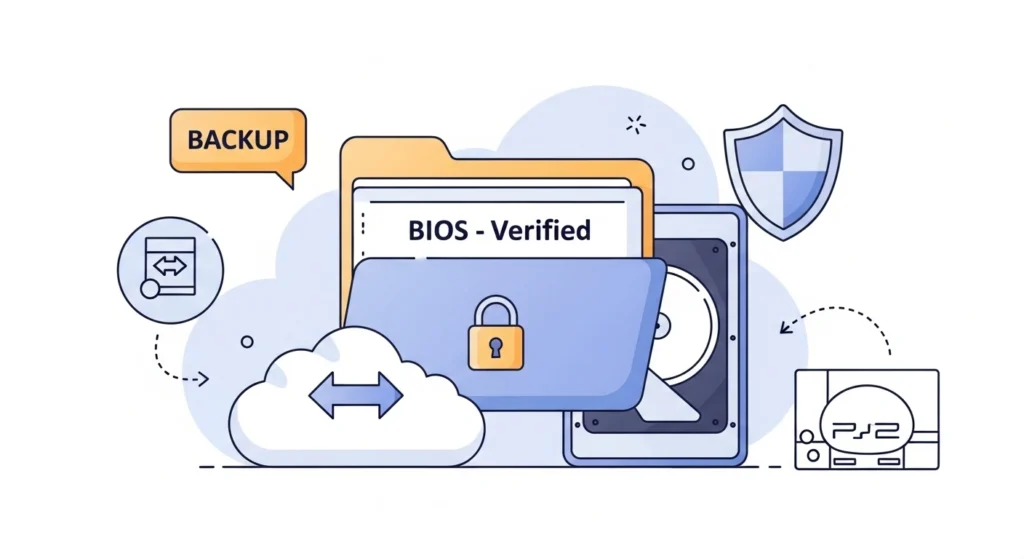
Once your BIOS file has been claimed and verified, it’s important to keep it safe. BIOS files are essential for emulator functionality, and if they get corrupted, lost, or infected, you could find yourself troubleshooting all over again. Here’s how to keep them secure:
1. Store a Backup in the Cloud
Upload a copy of your verified BIOS file to a secure cloud storage service like Google Drive or Dropbox. Create a folder labeled clearly (e.g., “PS2 BIOS – Verified”) so you’ll always have access—even if your PC crashes.
2. Use a Dedicated BIOS Folder
Keep your BIOS files organized in a specific folder—separate from ROMs or emulator installs. This makes them easier to manage and avoids accidental deletion or overwriting.
3. Don’t Rename or Edit the File
Once the file is verified, avoid changing the name or editing it. Some emulators match files using exact checksums or filenames, so renaming might cause recognition issues.
4. Avoid Downloading BIOS Files from Unverified Sources
If you didn’t dump the BIOS yourself, be extra cautious. Only use BIOS files that come from known, trusted sources—preferably your own console. Stay away from sketchy websites or YouTube links promising “PS2 BIOS 100% working.”
5. Keep the Claim Log or Confirmation File
Some versions of the PS BIOS Claim Tool allow you to export a claim log. Save this with your BIOS file—it can act as proof of verification if needed across multiple platforms.
Keeping your BIOS files safe is a small step that prevents big headaches later. Treat them like any other system-critical file: back them up, name them clearly, and never download blindly.
Final Thoughts: Do You Really Need It?
If you’re serious about PlayStation emulation—whether on PC, Android, or other platforms—the answer is yes, using the PS BIOS Claim Tool is absolutely worth it.
While many users skip this step and run emulators with whatever BIOS file they find online, they’re often risking poor performance, crashes, or even security threats. A claimed BIOS file isn’t just a safety measure—it’s a quality assurance step. It gives you confidence that your emulator is built on a solid, reliable foundation.
Plus, the tool itself is lightweight, easy to use, and doesn’t require advanced technical knowledge. Even if you’re a beginner, following the basic steps in this guide can save you hours of troubleshooting later.
And with emulators constantly evolving to support higher resolutions, faster speeds, and more accurate game rendering, having a verified BIOS ensures you get the best possible experience—without the guesswork.
In short: You don’t just want the PS BIOS Claim Tool—you’ll be glad you used it.
Jaiden Smith
Hi, I’m Jaiden Smith — the owner of PSBIOS.us. I’ve built this platform to make it easy and safe for users to access PlayStation BIOS files for emulators. Whether you're looking to enhance your retro gaming setup or just need a reliable BIOS source, I personally ensure everything here is clean, secure, and up-to-date.